2014年3月13日木曜日

Apacheのログ出力先を変更し日次でrotateする設定

Apacheのログはデフォルトでは、/etc/logrotate.conf と /etc/logrotate.d/httpd の
設定により週次でローテートされ4世代のバックアップを保持します。およそ1か月以上前のログは
参照できなくなります。大規模サイト等では長期間のログを保持する必要があるためこの設定は
不都合になることがあります。

一般的にApacheのログ出力先とWebサイトコンテンツは別ボリュームに分けたほうがよいと
考えられます。Apacheのログ出力先を変更(/log/ 以下)して日次で出力する設定をまとめます。

また、ログは削除せず、任意のタイミングでアーカイブするシェルスクリプトも準備します。

OS: RedHat EL 6.4(64-bit)
Apache: 2.2.15
仮ドメイン名: domain1.com、domain2.com


■Apacheのログを日次で出力
httpd.confの下記個所を変更します。
ログファイル名に日付を付与し、1日(=86400秒)ごとに出力します。
VirtualHost別のログ出力先を考慮して /log/httpd/[ドメイン名]/ 以下に変更します。
[root@dcf-web ~]# grep -B 1 rotatelogs /etc/httpd/conf/httpd.conf
#ErrorLog logs/error_log
ErrorLog "| /usr/sbin/rotatelogs -l /log/httpd/domain1.com/error_log-%Y%m%d 86400"
--
#CustomLog logs/access_log combined
CustomLog "| /usr/sbin/rotatelogs -l /log/httpd/domain1.com/access_log-%Y%m%d 86400" combined
[root@dcf-web ~]#
※domain2.comの設定は省略。
※/log/httpd/domain1.com-access_log-%Y%m%d と /log/httpd/domain2.com-access_log-%Y%m%d
 のようにして、ファイル名でドメインを区別する方法もアリです。

⇒ログ出力状況(以下のhttpdlog_archive.shを実行済み)
[root@dcf-web ~]# ll /log/httpd/domain1.com/ | head
合計 1045260
-rw-r--r-- 1 root root    40813  1月  1 23:59 2014 access_log-20140101
-rw-r--r-- 1 root root    40698  1月  2 23:59 2014 access_log-20140102
-rw-r--r-- 1 root root    43786  1月  3 23:59 2014 access_log-20140103
-rw-r--r-- 1 root root    40418  1月  4 23:59 2014 access_log-20140104
-rw-r--r-- 1 root root    52147  1月  5 23:59 2014 access_log-20140105
-rw-r--r-- 1 root root    40623  1月  6 23:59 2014 access_log-20140106
-rw-r--r-- 1 root root    40426  1月  7 23:59 2014 access_log-20140107
-rw-r--r-- 1 root root    42826  1月  8 23:59 2014 access_log-20140108
-rw-r--r-- 1 root root    40254  1月  9 23:59 2014 access_log-20140109
[root@dcf-web ~]#

■3ヵ月前のhttpdログをアーカイブするシェルスクリプト
シェルスクリプトファイル名: httpdlog_archive.sh
#!/bin/sh
#######################################################################
# << 機能概要 >>
# 3ヵ月前のApacheのログファイル1か月分をアーカイブ後、生ログ削除
# ログ出力先: /log/httpd/domain1.com/
#           /log/httpd/domain2.com/
#
# << 変更履歴 >>
# Version  変更日       変更者        変更内容
# --------+------------+-----------+----------------------------------
#     1.0  2014/03/06   tanyao    New
#
#######################################################################

# 対象月を取得(yyyymm)
TARGET_MONTH=`date -d '3 months ago' '+%Y%m'`

# ログ保存先ディレクトリパス
LOG_DIR=/log/httpd

# 対象ディレクトリへ移動
cd ${LOG_DIR}

# 出力対象ファイルが既に存在する場合は終了
if [ -f domain1.com_${TARGET_MONTH}.tar.gz ] || [ -f domain2.com_${TARGET_MONTH}.tar.gz ]; then
    echo "tar file already exit."
    exit 1
fi

# 対象ログファイルアーカイブ
tar -zcf domain1.com_${TARGET_MONTH}.tar.gz domain1.com/*_log-${TARGET_MONTH}*
tar -zcf domain2.com_${TARGET_MONTH}.tar.gz domain2.com/*_log-${TARGET_MONTH}*

# 生ログは削除
rm -rf domain1.com/*_log-${TARGET_MONTH}*
rm -rf domain2.com/*_log-${TARGET_MONTH}*

cd -

exit 0

■crontabに登録
[root@dcf-web ~]# crontab -l | tail -2
# httpd log archive
22 2 2 * * (/opt/private/batch/httpdlog_archive.sh > /dev/null 2>&1)
[root@dcf-web ~]#
⇒ログアーカイブ状況
[root@dcf-web ~]# ll /log/httpd/
合計 272
drwxr-xr-x 2 root root  20480  3月 12 15:01 2014 domain1.com
-rw-r--r-- 1 root root     45  2月  2 22:00 2014 domain1.com_201311.tar.gz
-rw-r--r-- 1 root root 189336  3月  2 22:01 2014 domain1.com_201312.tar.gz
drwxr-xr-x 2 root root  20480  3月 12 14:59 2014 domain2.com
-rw-r--r-- 1 root root   8780  2月  2 22:01 2014 domain2.com_201311.tar.gz
-rw-r--r-- 1 root root  23253  3月  2 22:01 2014 domain2.com_201312.tar.gz
[root@dcf-web ~]#

こちらの情報が何かのお役に立てましたら幸いです。サイト継続のご協力ありがとうございます。m(_ _)m

2014年3月9日日曜日

CentOS6.5 インストールパッケージとソフトウェアのバージョン

CentOS6.5のインストール時に選択できるパッケージを調査。
 □:インストールしない
 ■:インストールする
で表示しています。
後半では主なソフトウェアのバージョンも確認しています。(rpm -q しているだけですが・・・)

・CentOS 6.5 (64-bit)
・Kernel: 2.6.32-431
・インストールパッケージタイプ: Basic Server

【High Availability】
 □ High Availability
 □ High Availability の管理

【Load Balancer】
 □ Load Balancer

【Resilient Storage】
 □ Resilient Storage

【Scalable Filesystem】
 □ Scalable Filesystem

【Webサービス】
 □ PHP サポート
 □ TurboGears アプリケーションフレームワーク
 □ Web サーバー
 □ Web サーブレットエンジン

【アプリケーション】
 □ Emacs
 □ TeX のサポート
 □ インターネットアプリケーション
 □ インターネットブラウザ
 □ オフィススイートと生産性
 □ グラフィックツール
 □ 技術文書

【サーバー】
 □ CIFS ファイルサーバー
 □ FTP サーバー
 □ NFS ファイルサーバ
 ■ サーバープラットフォーム
 □ システム管理ツール
 □ ディレクトリサーバー 
 □ ネットワークインフラストラクチャサーバー
 □ ネットワークストレージサーバー
 □ バックアップサーバー
 □ プリントサーバー
 □ 識別管理サーバー
 □ 電子メールサーバー

【システム管理】
 □ SNMP サポート
 □ WBEM サポート
 □ システム管理
 □ メッセージング接続クライアントのサポート

【デスクトップ】
 □ KDEデスクトップ
 □ X Window System
 □ グラフィカル管理ツール
 □ デスクトップ
 □ デスクトップのデバッグとパフォーマンスツール
 □ デスクトッププラットフォーム
 □ フォント
 □ リモートデスクトップ接続クライアント
 □ レガシー X Windows システムの互換性
 □ 入力メソッド
 □ 汎用デスクトップ (GNOMEデスクトップ)

【データベース】
 □ MySQL データベースサーバー
 □ MySQL データベース接続クライアント
 □ PostgreSQL データベースサーバー
 □ PostgreSQL データベース接続クライアント

【ベースシステム】
 □ FCoE ストレージ接続クライアント
 □ Infiniband のサポート
 ■ Java プラットフォーム
 ■ Perl のサポート
 □ Ruby サポート
 □ iSCSI ストレージ接続クライアント
 ■ コンソールインターネットツール
 □ ストレージ可用性ツール
 □ スマートカードのサポート
 □ セキュリティツール
 □ ダイヤルアップネットワークサポート
 ■ ディレクトリ接続クライアント
 ■ デバッグツール
 □ ネットワーキングツール
 ■ ネットワークファイルシステムクライアント
 ■ ハードウェア監視ユーティリティ
 □ バックアップクライアント
 ■ パフォーマンスツール
 ■ ベース
 □ メインフレームアクセス
 □ レガシー UNIX の互換性
 □ 互換性ライブラリ
 □ 印刷クライアント
 ■ 大規模システムのパフォーマンス
 □ 数学/科学系および並列計算

【仮想化】
 □ 仮想化
 □ 仮想化クライアント
 □ 仮想化ツール
 □ 仮想化プラットフォーム

【言語】
 ■ 日本語のサポート
 ※ 他は省略

【開発】
 □ Eclipse
 □ その他の開発
 □ サーバープラットフォーム開発
 □ デスクトッププラットフォーム開発
 □ 開発ツール

CentOS6.4からの変更点としては、下記になります。
【サーバー】 □ 識別管理サーバー ←New!
【システム管理】 □ システム管理 Messaging Server のサポート ←廃止
【ベースシステム】 □ クライアント管理ツール ←廃止

■OSバージョン確認
[root@centos65 ~]# cat /etc/redhat-release
CentOS release 6.5 (Final)
[root@centos65 ~]# uname -r
2.6.32-431.el6.x86_64
[root@centos65 ~]#

■java
[root@centos65 ~]# java -version
java version "1.7.0_45"
OpenJDK Runtime Environment (rhel-2.4.3.3.el6-x86_64 u45-b15)
OpenJDK 64-Bit Server VM (build 24.45-b08, mixed mode)

■apache
[root@centos65 ~]# rpm -q httpd
httpd-2.2.15-29.el6.centos.x86_64

■perl
[root@centos65 ~]# rpm -q perl
perl-5.10.1-136.el6.x86_64

■php
[root@centos65 ~]# rpm -q php
php-5.3.3-26.el6.x86_64

■mysql
[root@centos65 ~]# rpm -q mysql
mysql-5.1.71-1.el6.x86_64

■samba
[root@centos65 ~]# rpm -q samba
samba-3.6.9-164.el6.x86_64

■postfix
[root@centos65 ~]# rpm -q postfix
postfix-2.6.6-2.2.el6_1.x86_64
[root@centos65 ~]# rpm -q sendmail
パッケージ sendmail はインストールされていません。

■vsftpd
[root@centos65 ~]# rpm -q vsftpd
vsftpd-2.2.2-11.el6_4.1.x86_64

■nfs
[root@centos65 ~]# rpm -qa | grep nfs
nfs4-acl-tools-0.3.3-6.el6.x86_64
nfs-utils-lib-1.1.5-6.el6.x86_64
nfs-utils-1.2.3-39.el6.x86_64

■cifs
[root@centos65 ~]# rpm -qa | grep cifs
cifs-utils-4.8.1-19.el6.x86_64

■openldap
[root@centos65 ~]# rpm -q openldap
openldap-2.4.23-32.el6_4.1.x86_64

■openssl
[root@centos65 ~]# rpm -q openssl
openssl-1.0.1e-15.el6.x86_64

■wget
[root@centos65 ~]# rpm -q wget
wget-1.12-1.8.el6.x86_64

こちらの情報が何かのお役に立てましたら幸いです。サイト継続のご協力ありがとうございます。m(_ _)m

2014年3月8日土曜日

CentOS6.5 GUI インストール

2013年12月にリリースされたCentOS6.5のISOファイルを取得し、VMware ESXi上に構築した手順を画面キャプチャ入りでまとめます。
KVMがvmdk対応になったり、OpenSSLのバージョンがアップデートされたりしているそうですが、すぐに使う予定は皆無です。

・VMware ESXi 5.0
・CentOS 6.5 (64-bit)
・Kernel: 2.6.32-431
・インストールパッケージタイプ: Desktop


■ESXiにインストーラ(isoファイル)準備
PCにダウンロードしたCentOS-6.5-x86_64-bin-DVD1/2.isoファイルをESXiのデータストアにアップロードします。


■ESXiの仮想マシン起動時にisoファイルでブートする設定
仮想マシンを右クリック → 設定の編集 → CD/DVDドライブの設定


■インストーラ起動


■Discチェック
そろそろデフォルトでSkipにしてくれないかな・・・。isoファイルでのインストールが大半では?!


■インストール開始


■言語選択
英語のままにしようかと迷いましたが、迷わず日本語で。


■ストレージデバイス
SANなんて高価な環境ありません。
どんなデータだって破棄しちゃってください。新規インストールなので何もないですが。


■ホスト名
適当に 命名するほど 迷います。


■ネットワークの設定
「ネットワークの設定」 → 「編集」

「自動接続する」にチェック
「IPv4のセッティング」タブでアドレスとネットマスクを設定


■タイムゾーン
「システムクロックでUTCを使用」の説明↓
通常時間とサマータイム時間を自動的に切り替えるようにしたい場合は、これを使用します。
ハードウェアクロックを調節して同じ機能を達成する別のOS(Microsoft Windows(tm)など、)が
マシン上にある場合、これは使用しないでください。
日本はまだサマータイム導入されていないので、とりあえずUTCのチェックは外します。


■rootパスワード


■インストール領域


■パッケージタイプ
Desktopを選択。CentOS6.4から若干の項目変更あり。


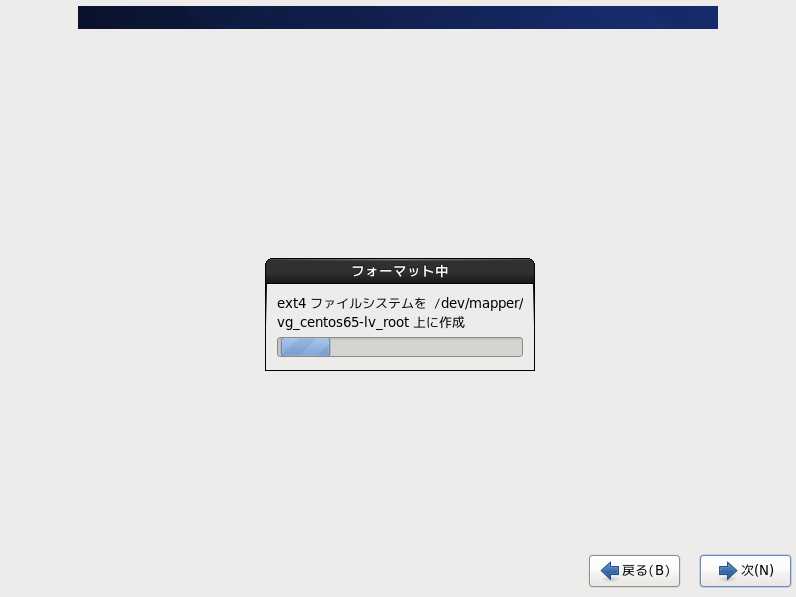
■インストール処理
ディスクの速い物理サーバだと10分くらいかも。


■インストール完了
再起動する前にインストールディスクを外しておきましょう。
ESXiなら、CD/DVDドライブのデバイスタイプをクライアントデバイスに設定。


■インストール後設定


■ライセンス情報
強制的に同意させられているよね・・・。


■ユーザーの作成
ユーザ名にまたしても迷う。あげく、いたってフツーな名前。


■日付と時刻
UTC時間になっているので必要に応じ修正する。


■Kdump
有効にできるように仮想マシンのメモリを2GB割り当てました。サイズはデフォルト値で。

Kdumpを有効にするとシステム再起動が必要となるようです。

■ログイン
迷わずrootユーザで。


■背景とテーマ変更
選択肢が増えたわけではない。その時の気分で背景変更。


■OSの状況確認
[root@centos65 ~]# cat /etc/redhat-release
CentOS release 6.5 (Final)
[root@centos65 ~]# uname -r
2.6.32-431.el6.x86_64
[root@centos65 ~]# rpm -qa | wc -l
1106
[root@centos65 ~]# df -hT
Filesystem                      Type   Size  Used Avail Use% Mounted on
/dev/mapper/vg_centos65-lv_root ext4    27G  3.6G   22G  15% /
tmpfs                           tmpfs  940M  228K  939M   1% /dev/shm
/dev/sda1                       ext4   485M   39M  421M   9% /boot
[root@centos65 ~]#
Desktopだとパッケージの数が1100以上。ディスク使用量も3.6GB。
実運用で構築する場合はMinimalタイプ+αがお勧めかも。

こちらの情報が何かのお役に立てましたら幸いです。サイト継続のご協力お願いいたします。m(_ _)m

2014年2月27日木曜日

複数の.htaccessと.htpasswdによるBasic認証

複数の.htaccessと.htpasswdを使用してWebサイトの複数個所にBasic認証を設定する手順です。
どこか1箇所のBasic認証を通過したユーザが他の個所に設定したBasic認証を認証なしで表示でき
ないようにアクセス制御できることを考慮しています。

.htpasswdはWebサイト管理者が管理する想定(CMSでは管理せず、変更は申請制)とし、
.htaccessはWebコンテンツの一部として扱う想定(CMS等で管理可能)とする。

OS: CentOS 6.4(64-bit)
Apache: 2.2.15
hostname: dcf-web
ip: 192.168.3.246


■.htpasswd作成
user10,user11 → ldap1.htpasswdで管理
user20,user21 → ldap2.htpasswdで管理
※ .htpasswdファイルはなるべくDocmentRoot以外のブラウザから直接アクセスできない場所に配置する。
[root@dcf-web ~]# mkdir /etc/httpd/htpasswd/
[root@dcf-web ~]# htpasswd -bc /etc/httpd/htpasswd/ldap1.htpasswd user10 10user
Adding password for user user10
[root@dcf-web ~]# htpasswd -b /etc/httpd/htpasswd/ldap1.htpasswd user11 11user
Adding password for user user11
[root@dcf-web ~]# cat /etc/httpd/htpasswd/ldap1.htpasswd
user10:iYP5xGnK32WPU
user11:lQXWHpaPkcB2c
[root@dcf-web ~]# htpasswd -bc /etc/httpd/htpasswd/ldap2.htpasswd user20 20user
Adding password for user user20
[root@dcf-web ~]# htpasswd -b /etc/httpd/htpasswd/ldap2.htpasswd user21 21user
Adding password for user user21
[root@dcf-web ~]# cat /etc/httpd/htpasswd/ldap2.htpasswd
user20:JQ0GxC.9s6Ips
user21:cwhMtpgo9dJOg
[root@dcf-web ~]#
htpasswd コマンドのオプション
-b: パスワードを直接指定
-c: .htpasswdを新規作成

■httpd.confに.htaccess使用許可設定
最下行に下記のような内容を追記する。
[root@dcf-web ~]# tail -6 /etc/httpd/conf/httpd.conf
<Directory "/var/www/html/ldap1">
    AllowOverride All
</Directory>
<Directory "/var/www/html/ldap2">
    AllowOverride All
</Directory>
[root@dcf-web ~]#
※ 上位階層のディレクティブに対してAllowOverride Allを設定するとWebサーバのパフォーマンスが落ちる可能性があるので注意。

■.htaccess作成
[root@dcf-web ~]# cat /var/www/html/ldap1/.htaccess
AuthType Basic
AuthName "Basic Authentication Area"
AuthUserFile /etc/httpd/htpasswd/ldap1.htpasswd
AuthGroupFile /dev/null
require valid-user
ErrorDocument 401 /401.html
[root@dcf-web ~]# cat /var/www/html/ldap2/.htaccess
AuthType Basic
AuthName "Basic Authentication Area"
AuthUserFile /etc/httpd/htpasswd/ldap2.htpasswd
AuthGroupFile /dev/null
require valid-user
ErrorDocument 401 /401.html
[root@dcf-web ~]#
"401"は認証エラー時のステータスコード。
認証エラーページとして /var/www/html/401.html を準備しておく。

■動作確認
                            user10 user11 user20 user21
http://192.168.3.246/ldap1/    ○      ○      ×      ×
http://192.168.3.246/ldap2/    ×      ×      ○      ○

## access_log
http://192.168.3.246/ldap1/ に user11 でアクセスしたときのログ。
[root@dcf-web ~]# tail -f /var/log/httpd/access_log
192.168.3.13 - - [21/Feb/2014:18:57:15 +0900] "GET /ldap1/ HTTP/1.1" 401 16262 "-" "Mozilla/4.0 (compatible; MSIE 7.0; Windows NT 6.1; WOW64; Trident/5.0; SLCC2; .NET CLR 2.0.50727; .NET CLR 3.5.30729; .NET CLR 3.0.30729; Media Center PC 6.0; .NET4.0C; .NET4.0E; InfoPath.3)"
192.168.3.13 - user11 [21/Feb/2014:18:57:20 +0900] "GET /ldap1/ HTTP/1.1" 200 16109 "-" "Mozilla/4.0 (compatible; MSIE 7.0; Windows NT 6.1; WOW64; Trident/5.0; SLCC2; .NET CLR 2.0.50727; .NET CLR 3.5.30729; .NET CLR 3.0.30729; Media Center PC 6.0; .NET4.0C; .NET4.0E; InfoPath.3)"

こちらの情報が何かのお役に立てましたら幸いです。サイト継続ご協力のほどお願い申し上げます。m(_ _)m

2014年2月22日土曜日

How to configure the Linux static routes

If the server is connected to multiple network segments, you might not be able to access if properly only set the default gateway. 

Access from the Internet to route the DMZ segment, access from the Corporate Network will be routed to the maintenance segment. I will describe how to configure a static route to each network interface. 

Because the only route command, setting may be cleared to OS reboot, I will also describe how to do the routing configuration permanently.

OS: RedHat EL 6.4(64-bit)


Network Overview


Network Overview it is assumed this is as of FIG.
Default gateway will not face the Internet side.

Routing table information before setting

[root@dcf-web-a ~]# route
Kernel IP routing table
Destination     Gateway         Genmask         Flags Metric Ref    Use Iface
10.5.116.0      *               255.255.255.0   U     1      0        0 eth0
10.5.117.0      *               255.255.255.0   U     1      0        0 eth1
default         10.5.116.254    0.0.0.0         UG    0      0        0 eth0
[root@dcf-web-a ~]#
If you leave this, for example, it will return to the DMZ segment is also access from the PC of 192.168.xxx.xxx.
Therefore, it can not communicate.

Set the gateway of maintenance segment side

[root@dcf-web-a ~]# route add -net 10.0.0.0 gw 10.5.117.254 netmask 255.0.0.0 eth1
[root@dcf-web-a ~]# route
Kernel IP routing table
Destination     Gateway         Genmask         Flags Metric Ref    Use Iface
10.5.116.0      *               255.255.255.0   U     1      0        0 eth0
10.5.117.0      *               255.255.255.0   U     1      0        0 eth1
10.0.0.0        10.5.117.254    255.0.0.0       UG    0      0        0 eth1
default         10.5.116.254    0.0.0.0         UG    0      0        0 eth0
[root@dcf-web-a ~]#
I added a Lou Funding set to the network from 10.0.0.0/8.
It was assumed 10.5.117.254 the gateway, but in fact was 10.5.117.170 ....
Please set according to each environment.

Deleting a static route

[root@dcf-web-a ~]# route del -net 10.0.0.0 gw 10.5.117.254 netmask 255.0.0.0 eth1
[root@dcf-web-a ~]# route
Kernel IP routing table
Destination     Gateway         Genmask         Flags Metric Ref    Use Iface
10.5.116.0      *               255.255.255.0   U     1      0        0 eth0
10.5.117.0      *               255.255.255.0   U     1      0        0 eth1
default         10.5.116.254    0.0.0.0         UG    0      0        0 eth0
[root@dcf-web-a ~]#

Set the gateway of maintenance segment side again

[root@dcf-web-a ~]# route add -net 10.0.0.0 gw 10.5.117.170 netmask 255.0.0.0 eth1
[root@dcf-web-a ~]# route
Kernel IP routing table
Destination     Gateway         Genmask         Flags Metric Ref    Use Iface
10.5.116.0      *               255.255.255.0   U     1      0        0 eth0
10.5.117.0      *               255.255.255.0   U     1      0        0 eth1
10.0.0.0        10.5.117.170    255.0.0.0       UG    0      0        0 eth1
default         10.5.116.254    0.0.0.0         UG    0      0        0 eth0
[root@dcf-web-a ~]#
The above settings will be cleared when you OS reboot.

Static route permanently set

[root@dcf-web-a ~]# vi /etc/sysconfig/network-scripts/route-eth1
[root@dcf-web-a ~]# cat /etc/sysconfig/network-scripts/route-eth1
10.0.0.0/8 via 10.5.117.170
192.168.0.0/16 via 10.5.117.170
[root@dcf-web-a ~]#
I manually create a route-eth1.

Setting reflection

[root@dcf-web-a ~]# /etc/init.d/network restart
インターフェース eth0 を終了中:  デバイスの状態: 3 (切断済み)
                                                           [  OK  ]
インターフェース eth1 を終了中:  デバイスの状態: 3 (切断済み)
                                                           [  OK  ]
ループバックインターフェースを終了中                       [  OK  ]
ループバックインターフェイスを呼び込み中                   [  OK  ]
インターフェース eth0 を活性化中:  アクティブ接続の状態: アクティベート済み
アクティブ接続のパス: /org/freedesktop/NetworkManager/ActiveConnection/5
                                                           [  OK  ]
インターフェース eth1 を活性化中:  アクティブ接続の状態: アクティベート済み
アクティブ接続のパス: /org/freedesktop/NetworkManager/ActiveConnection/6
                                                           [  OK  ]
[root@dcf-web-a ~]# route
Kernel IP routing table
Destination     Gateway         Genmask         Flags Metric Ref    Use Iface
10.5.116.0      *               255.255.255.0   U     1      0        0 eth0
10.5.117.0      *               255.255.255.0   U     1      0        0 eth1
192.168.0.0     10.5.117.170    255.255.0.0     UG    0      0        0 eth1
10.0.0.0        10.5.117.170    255.0.0.0       UG    0      0        0 eth1
default         10.5.116.254    0.0.0.0         UG    0      0        0 eth0
[root@dcf-web-a ~]#

The above setting is also reflected OS reboot. I'm glad this information if beneficial to you.