AWS上のEC2(CentOS)にGUIパッケージをインストールしてVNCで接続する手順です。
OracleDataBase等インストール時に、LinuxサーバだとしてもGUIがあれば便利です。
VNCサーバにはtigervnc-serverを利用します。
VNCクライアントにはRealVNCを利用します。

■構成情報
・OS:  CentOS6.3(64bit)
・tigervnc-server:  1.0.90
・RealVNC: 5.0.4
■GnomeGUIインストール
[root@centos63 ~]# yum groupinstall "X Window System" "GNOME Desktop Environment" "Desktop"
(中略)
Install     274 Package(s)
Upgrade       8 Package(s)

Total download size: 120 M
Is this ok [y/N]: y
(以下省略)
パッケージの数が膨大なのでそれなりに時間がかかります。
■VNCサーバインストール
[root@centos63 ~]# yum install tigervnc-server
==========================================================================
 Package             Arch    Version                         Repository  Size
==========================================================================
Installing:
 tigervnc-server     x86_64  1.0.90-0.17.20110314svn4359.el6 base       1.1 M
Installing for dependencies:
 xorg-x11-fonts-misc noarch  7.2-9.1.el6                     base       5.8 M

Transaction Summary
==========================================================================
Install       2 Package(s)
(以下省略)
■ユーザ作成(必要に応じて)
[root@centos63 ~]# useradd operation
[root@centos63 ~]# passwd operation
■VNCサーバ設定
設定ファイルvncserversに下記3行を追記、&自動起動設定[root@centos63 ~]# cp -p /etc/sysconfig/vncservers /etc/sysconfig/vncservers.org [root@centos63 ~]# vi /etc/sysconfig/vncservers [root@centos63 ~]# tail -3 /etc/sysconfig/vncservers VNCSERVERS="1:operation 2:root" VNCSERVERARGS[1]="-geometry 1024x768 -nolisten" VNCSERVERARGS[2]="-geometry 800x600 -nolisten" [root@centos63 ~]# [root@centos63 ~]# chkconfig vncserver on [root@centos63 ~]# chkconfig --list vncserver vncserver 0:off 1:off 2:on 3:on 4:on 5:on 6:off [root@centos63 ~]#
■VNC接続ユーザパスワード設定
[root@centos63 ~]# vncpasswd
Password:
Verify:
[root@centos63 ~]# su - operation
[operation@centos63 ~]$ vncpasswd
Password:
Verify:
[operation@centos63 ~]$
■VNCサーバ起動
[root@centos63 ~]# /etc/init.d/vncserver start
Starting VNC server: 1:operation xauth:  creating new authority file /home/operation/.Xauthority

New 'centos63:1 (operation)' desktop is centos63:1

Creating default startup script /home/operation/.vnc/xstartup
Starting applications specified in /home/operation/.vnc/xstartup
Log file is /home/operation/.vnc/centos63:1.log

2:root xauth:  creating new authority file /root/.Xauthority

New 'centos63:2 (root)' desktop is centos63:2

Creating default startup script /root/.vnc/xstartup
Starting applications specified in /root/.vnc/xstartup
Log file is /root/.vnc/centos63:2.log

                                                           [  OK  ]
[root@centos63 ~]#
■VNC利用時のデスクトップをGNOMEに設定
[root@centos63 ~]# vi .vnc/xstartup
[root@centos63 ~]# tail -2 .vnc/xstartup
# twm & ←コメントアウト
exec gnome-session & ←追記
[root@centos63 ~]#

[root@centos63 ~]# su - operation
[operation@centos63 ~]$ vi .vnc/xstartup
[operation@centos63 ~]$ tail -2 .vnc/xstartup
# twm & ←コメントアウト
exec gnome-session & ←追記
[operation@centos63 ~]$
[operation@centos63 ~]$ exit
logout
[root@centos63 ~]# /etc/init.d/vncserver restart
Shutting down VNC server: 1:operation 2:root               [  OK  ]
Starting VNC server: 1:operation
New 'centos63:1 (operation)' desktop is centos63:1

Starting applications specified in /home/operation/.vnc/xstartup
Log file is /home/operation/.vnc/centos63:1.log

2:root
New 'centos63:2 (root)' desktop is centos63:2

Starting applications specified in /root/.vnc/xstartup
Log file is /root/.vnc/centos63:2.log

                                                           [  OK  ]
[root@centos63 ~]#
■RealVNCダウンロード
http://www.realvnc.com/download/vnc/latest/VNC-5.0.4-Windows.exe(約7MB)
■RealVNCインストール
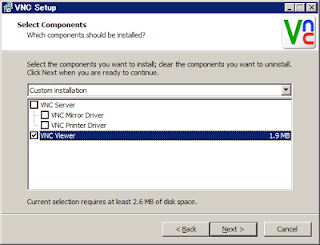
インストールはほぼヴィザードに従って進めるだけで完了できるので省略しますが、今回はVNCビューワがあればよいのでサーバはインストールしません。
■サーバに接続
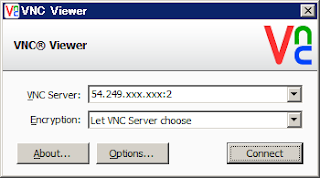
↑rootユーザ以外での接続が推奨ですが、rootユーザでも接続できます。
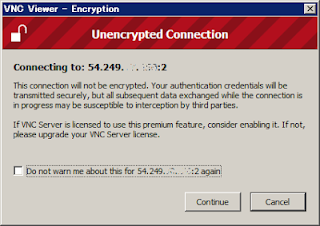
↑接続方式が暗号されていないので警告が出ていますがとりあえず無視。
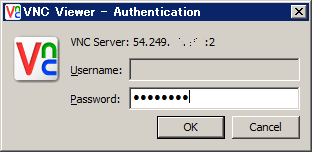
↑vncpasswdで設定したパスワードで接続。
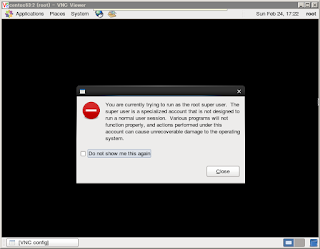
↑rootユーザで接続しようとしているとの警告が出る。

↑回線速度によってカラーモードのビット数が落とされる場合があります。
※時間がたつといきなりフルカラーになったりします。
最後までお読みいただきありがとうございます。この情報が何かのお役にたてれば幸いです。m(_ _)m
0 件のコメント:
コメントを投稿